Getting Blue Smoke From Your Weber Kettle Smoker
- Richard Reynolds Jr.

A Note to our readers:
In my latest blog post titled ” I Did Not Know I Could Do That With a Weber Kettle Part Three,” I delved into the intricacies of direct cooking. If you haven’t read it yet, you can find the post by selecting the link below: https://fireinthekettle.com/i-did-not-know-i-could-do-that-on-a-weber-kettle-part-three/. As the post began to exceed its intended length, I concluded with a promise to publish a follow-up piece this week. Unfortunately, the weather here in Falls Church hasn’t been ideal for outdoor activities, hindering my ability to capture images of the kettles in direct cooking mode. Rest assured, I’m working diligently to procure these visuals, and I aim to present the follow-up blog post on the direct cooking method by the middle of the week. Thank you for your patience and understanding.
The Purpose of Wood:
Wood plays a crucial role in the Indirect cooking method, especially during the Low and Slow cooking process. Smoking meat involves using various types of wood, each imparting a unique flavor to the meat. In Texas, for example, post oak is the preferred wood for smoking brisket or ribs. At Fire In The Kettle LLC in Virginia, we typically use apple wood for pork and mesquite or pecan for briskets and roasts, although post oak is occasionally used by our team, for briskets and ribs.
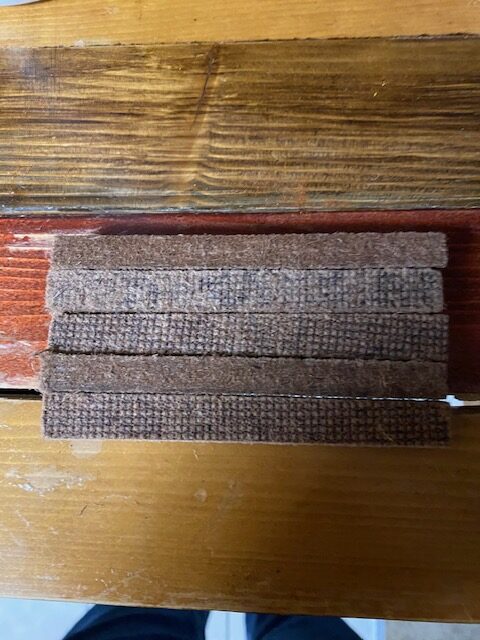
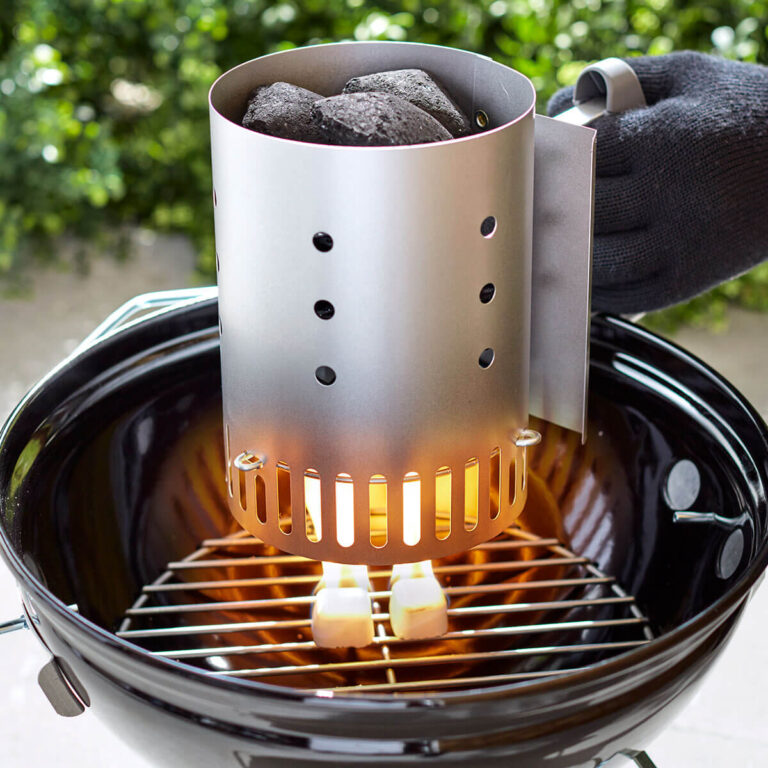
Once the Desired Wood is chosen:
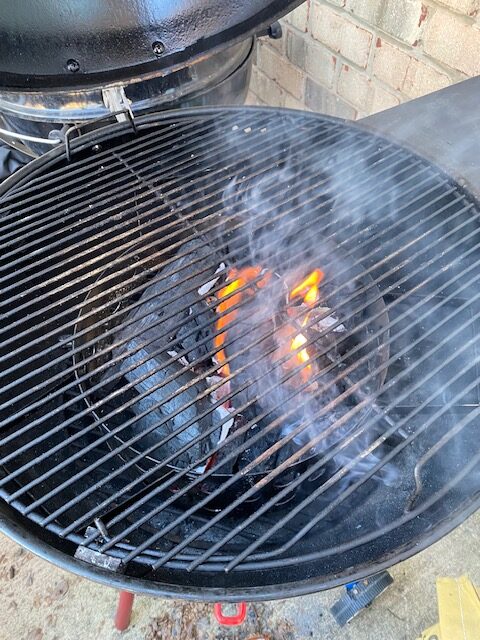
Regardless of the chosen wood type, the initial step in setting up the indirect cooking method revolves around preparing the charcoal. This pivotal process involves igniting the charcoal—whether briquettes or lump—to a red-hot state, and there exist several effective tools to accomplish this task. One such tool is the Chimney Starter, renowned for its efficiency and reliability in swiftly heating charcoal to the desired temperature. Alternatively, another method involves arranging wood sticks within a charcoal basket, strategically positioning briquettes or lump charcoal atop the wood, and igniting the sticks to initiate the combustion process. Once the charcoal reaches the desired red-hot intensity, it is carefully positioned on the charcoal grate within the kettle. To sustain the heat and ensure a prolonged smoking duration, additional unburned charcoal is added atop the red-hot coals, followed by the placement of the chosen wood for smoke infusion. Maintaining a precise temperature range of two-hundred-twenty-five to two-hundred-fifty degrees Fahrenheit within the kettle is paramount for optimal smoking results. This temperature range facilitates the production of a thin, blue smoke that gracefully billows from the top vent, signifying the ideal conditions for flavor infusion and culinary excellence during the smoking process. Achieving and sustaining this delicate balance of temperature and smoke production is key to unlocking the full potential of the indirect cooking method and yielding irresistibly flavorful dishes.
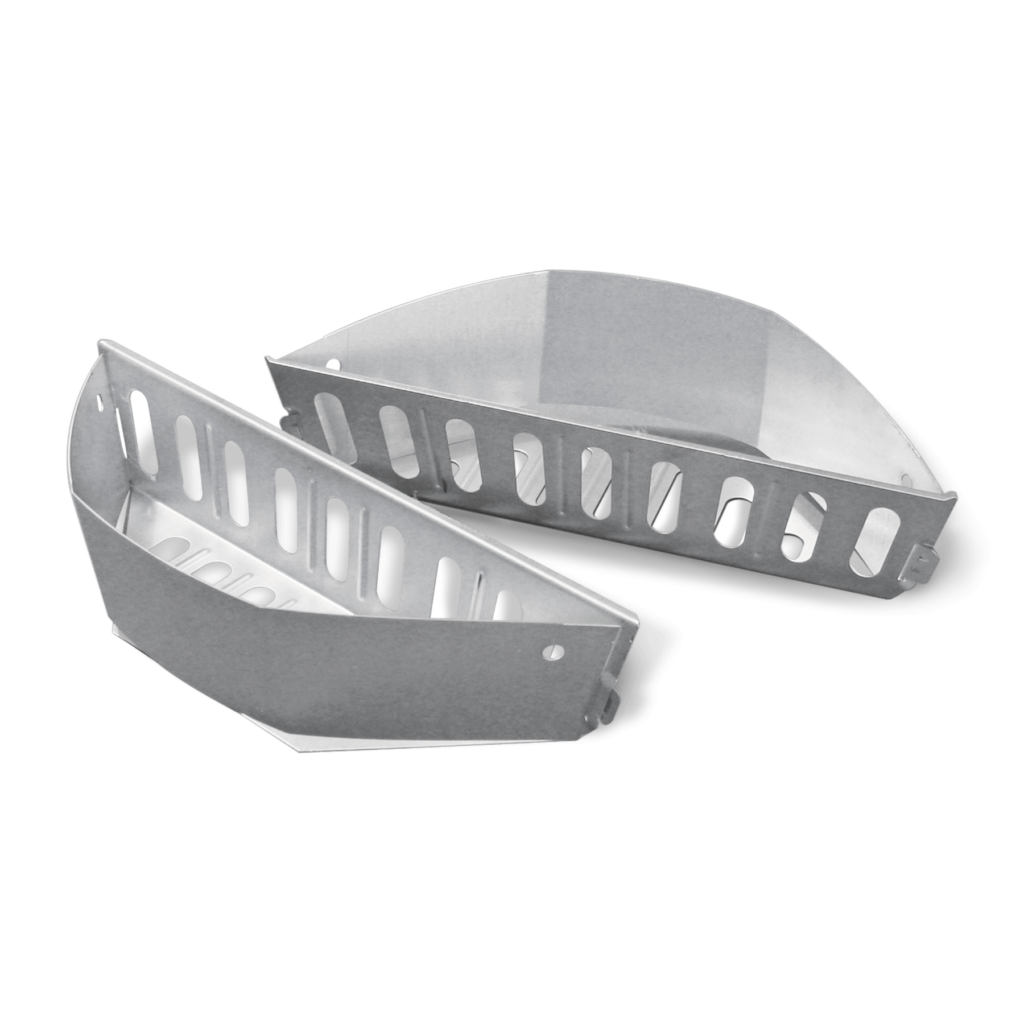
It is important to note:
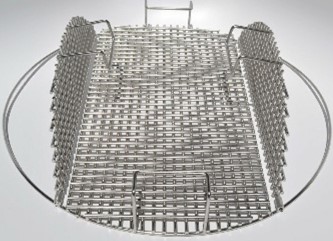
The Indirect Method serves as the cornerstone for smoking meats, offering a nuanced approach to achieving tender, flavorful results. Within this method, there are two primary variations: the Single Zone Indirect Method and the Dual Zone Indirect Method, each offering unique advantages for Low and Slow cooking enthusiasts. In the Single Zone approach, a single fuel source is positioned on one side of the kettle, while the meat destined for smoking is placed on the opposite side, away from direct heat exposure. To facilitate this setup, a charcoal basket proves indispensable, efficiently containing the fuel source and ensuring steady, consistent heat distribution throughout the smoking process. Conversely, the Dual Zone Indirect Method involves the strategic placement of two charcoal baskets atop the charcoal grate, flanking the central cooking area where the meat is positioned for smoking. This dual-basket configuration offers enhanced control over heat distribution and allows for more precise temperature management, ideal for achieving optimal results with larger cuts of meat or when utilizing varied smoking techniques. For both methods, the utilization of a dual cooking grate, as depicted in accompanying visuals, enhances versatility and convenience. It’s essential to ensure that when using this grate, the section where it flips up is positioned directly over the charcoal basket or baskets, facilitating easy access for tending to the fuel source or adjusting cooking configurations. Additionally, careful attention should be paid to the positioning of the top vent, which should never be directly placed over the fuel source to prevent unwanted flare-ups and ensure efficient smoke circulation throughout the kettle chamber. By mastering the intricacies of these Indirect Method variations and employing the appropriate tools and techniques, aficionados of Low and Slow cooking can unlock a world of culinary possibilities and elevate their smoking endeavors to new heights of excellence.
What Comes Next:
Before placing the meat in the Weber Kettle, ensure that Blue thin Smoke is billowing out from the top damper. To understand this, let’s delve into the science of combustion and smoke. Different types of smoke exist, each influenced by combustion and various chemical compounds released during wood burning. As wood burns, it releases trapped compounds, and new ones are formed due to extreme heat changes.
Smoke Explained:
Smoke is a complex mixture composed of various elements, including trace metals like nickel, copper, and zinc. However, its primary components are carbon monoxide (CO), carbon dioxide (CO2), nitrogen oxides (NO), water vapor, and fine particles such as ash, char, and creosote. Within this complexity, syringol, an essential wood ingredient, plays a significant role. Understanding these elements is crucial for creating the right smoke. In the following discussion, we’ll differentiate between different types of smoke, such as Blue thin Smoke versus White or Black, to help you achieve the best results. Stick around – it’ll all make sense soon.
Syringol Explained:
Syringol is a natural aromatic compound found in wood, especially in lignin, a part of plant cell walls. It gives wood smoke its unique scent. When wood burns, syringol is released along with other fragrant compounds, enhancing the flavor and aroma of smoked food. It’s just one of many chemicals that affect the taste and smell of smoked meats. Plus, syringol is responsible for the distinctive smell of certain types of wood smoke. This little insight into syringol not only helps us grasp the science behind wood smoke but also highlights its importance in creating the delightful smell associated with smoking. If you’re interested in diving deeper into smoking and grilling expertise, I will be providing more Blog Posts on this subject in the future.
Moving away from the science:
Now, shifting our focus from the science to practical considerations – it’s crucial to use dry wood on the smoker, free from any artificial additives like glue, paint, resin, or mold. When sourcing wood for smoking, a quick Google search for “Wood Used For Smokers” will display companies that specialize in retailing wood for smoking. These companies take measures to ensure that the wood they sell is suitable and safe for use in wood smokers. This step ensures that you get the best results and avoid any undesirable flavors or contaminants in your smoked food.
The four stages:
Understanding the four stages of burning wood is crucial for achieving a clean cook, with stage three being the ideal state for both the smoker and wood. The initial stage, known as the Evaporation Stage or the ignition phase, is often considered the challenging part. As discussed in my blog post “I Did Know I Could Do That With A Weber Kettle” Part Four, the most effective method to initiate wood burning is by using either charcoal briquets or lump charcoal ignited in a chimney starter, placed on the charcoal grate or within a charcoal basket in the Kettle.
The Second Stage:
Moving on to the second stage, known as the Pyrolysis Stage or commonly referred to as the “Fire” stage, as explained earlier in this blog. This is where the wood, placed atop the charcoal at the bottom of the Kettle on the charcoal grate or within a charcoal basket, begins to catch on fire. It’s worth noting that during this stage, you might observe black areas developing around the edges of the wood, although the wood is not technically burning in the traditional sense.
Achieving White Smoke:
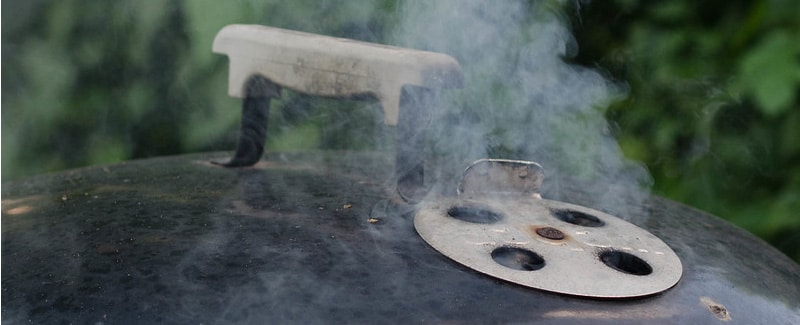
When the Kettle lid is positioned on top of the Kettle body, you will notice White Smoke billowing out of the top damper of the Weber Kettle. This occurs as the Kettle is working to reach the proper smoking temperatures. What’s crucial to understand at this stage is that the wood is undergoing chemical breakdown, releasing components like CO (carbon monoxide), CO2 (carbon dioxide), methane, water vapor, and other gases. This process contributes to the aromatic qualities and flavors that characterize the smoking stage.
The Third Stage:
Now, entering the Third Stage, often referred to as the “Where We Want To Be Stage.” In this stage, the charcoal on the charcoal grate has reached a temperature of around Five-Hundred-Forty-Degrees. However, on the Cold Side of the Kettle, the temperature is maintained between Two-Hundred-Twenty-Five to Two-Hundred-Fifty degrees, producing lovely Blue thin Smoke billowing out of the top damper of our Kettle grill. This smoke is essential for permeating the meat with flavor during the smoking process.
Heat and Internal Temperature:
It’s crucial to understand that although the charcoal on the grate or in the charcoal basket may be burning at a temperature of Five-Hundred-Forty-Degrees, the internal temperature of the Kettle is not the same. Control over the Kettle’s temperature is managed by both the top and bottom dampers. Based on my experience, I recommend keeping the bottom damper cracked at about a third of the way open and the top damper at about a quarter open. If adjustments are needed, start with the top damper to increase the temperature. Remember that temperature changes inside the Weber Kettle may take up to fifteen minutes to stabilize, so exercising patience is key for achieving optimal cooking conditions.
In Conclusion:
Mastering the art of achieving blue smoke in your Weber kettle can elevate your smoking game to new heights. Understanding the components of smoke, such as syringol, and learning the techniques to achieve the right smoke can significantly enhance the flavor and aroma of your smoked meats. So, whether you’re a seasoned pitmaster or just starting out on your smoking journey, harnessing the power of blue smoke will undoubtedly take your culinary creations to the next level. Keep experimenting, keep refining, and soon you’ll be enjoying perfectly smoked delicacies every time. Happy grilling/Smoking!